
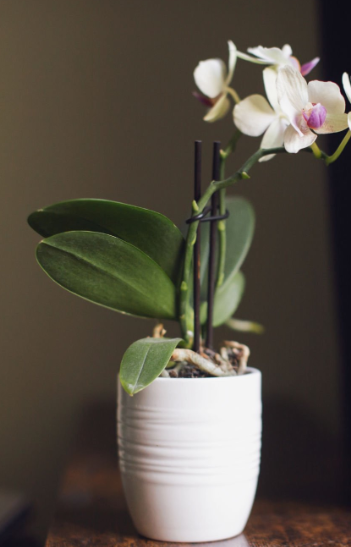
The Simple Fertilizer Tip That Can Help Your Orchid Thrive
Orchids are known for their elegant flowers, unique shapes, and ability to brighten indoor spaces. However, many orchid owners find that keeping these beautiful plants healthy can sometimes feel challenging. An orchid may produce flowers one season and then appear to stop growing, leaving plant lovers wondering what they are doing wrong.
While orchids do not require complicated care routines, they do need the right balance of light, water, humidity, and nutrients. One simple fertilizer habit that can help support healthier growth is using a diluted fertilizer solution regularly instead of applying strong amounts occasionally.
This approach is often called “weakly, weekly” feeding, and it can help provide orchids with steady nutrients while reducing the risk of fertilizer buildup in the growing medium.
In this guide, we’ll explore why this fertilizer method works, how to feed orchids properly, common mistakes to avoid, and additional care tips that can help your orchid thrive.
Why Orchids Need Fertilizer
Like all plants, orchids need nutrients to grow. In their natural environments, many orchids grow attached to trees or other surfaces rather than in traditional soil. They receive nutrients slowly from rainwater, organic matter, and surrounding plant material.
Because orchid potting mixes are usually made from materials such as bark, moss, or other lightweight mediums, they often contain limited nutrients.
Fertilizer helps provide essential elements, including:
- Nitrogen for leaf and stem growth
- Phosphorus for root development and flowering support
- Potassium for overall plant strength
- Calcium and magnesium for healthy growth
- Trace minerals needed in small amounts
Without enough nutrients, orchids may develop weak growth, pale leaves, or fewer flowers.
The Simple Fertilizer Tip: Feed Lightly and Regularly
One of the most common mistakes orchid owners make is using too much fertilizer at once.
A concentrated fertilizer solution can damage orchid roots and create salt buildup inside the pot.
Instead, many growers recommend applying a diluted fertilizer solution on a regular schedule.
This method provides a gentle supply of nutrients that matches how orchids naturally receive nourishment.
How the “Weakly, Weekly” Method Works
The basic idea is:
- Dilute orchid fertilizer to a lower concentration than the label’s maximum recommendation.
- Apply it regularly during active growth.
- Occasionally flush the pot with plain water to remove excess minerals.
This creates a more consistent nutrient environment for the plant.
How to Fertilize an Orchid Correctly
Follow these simple steps to feed your orchid safely.
Step 1: Choose the Right Fertilizer
Look for a fertilizer designed for orchids or flowering plants.
Many orchid fertilizers contain a balanced blend of nutrients.
Some formulas have different ratios depending on the plant’s growth stage, but a balanced fertilizer is often suitable for general orchid care.
Step 2: Dilute the Fertilizer
Orchid roots can be sensitive, especially in indoor growing conditions.
Use a weaker solution than you might use for outdoor plants.
Always follow the product instructions and avoid increasing the concentration in an attempt to make the plant grow faster.
Step 3: Water Before Fertilizing
Avoid applying fertilizer to completely dry orchid roots.
A good practice is:
- Water the orchid with plain water first.
- Allow excess water to drain.
- Apply the diluted fertilizer solution afterward.
This helps reduce the chance of root damage.
Step 4: Flush the Pot Regularly
Over time, fertilizer salts can accumulate in the potting medium.
Every few weeks, run plain water through the pot to help remove excess minerals.
Make sure the container drains completely afterward.
When Should You Fertilize an Orchid?
Timing depends on the orchid variety and growing conditions, but many orchids benefit from more frequent feeding during active growth.
Common signs that an orchid is actively growing include:
- New leaves appearing
- New roots developing
- Flower spikes forming
During slower growth periods, the plant may require less fertilizer.
Avoid forcing growth with excessive feeding when the orchid is naturally resting.
Signs Your Orchid May Need More Nutrients
A nutrient deficiency may show through changes in the plant.
Possible signs include:
Pale Green Leaves
Healthy orchid leaves are usually firm and green. Yellowing or pale leaves can sometimes indicate nutrient problems, although overwatering and other issues can cause similar symptoms.
Slow Growth
If your orchid produces few new leaves or roots over a long period, it may not be receiving ideal growing conditions.
Weak Flower Production
A lack of blooms may be related to many factors, including insufficient light, temperature changes, or nutrient imbalance.
Fertilizer is only one part of successful orchid care.
Common Fertilizing Mistakes to Avoid
Using Too Much Fertilizer
More fertilizer does not always mean faster growth.
Excess nutrients can burn roots and damage the plant.
Fertilizing a Sick or Stressed Orchid
If an orchid is struggling because of root problems, pests, or environmental stress, adding fertilizer may create additional strain.
First identify and address the underlying problem.
Ignoring Water Quality
Some tap water contains high levels of minerals that can contribute to buildup in orchid pots.
If your water is very hard, occasional flushing becomes especially important.
Fertilizing During Dormancy
Some orchids naturally slow down after flowering.
Reducing fertilizer during these periods may better match the plant’s needs.
Other Care Tips to Help Orchids Thrive
Fertilizer alone cannot guarantee healthy growth. Orchids need the right environment.
Provide Bright, Indirect Light
Light is one of the most important factors for orchid health.
Many orchids grow best with:
- Bright filtered light
- Protection from harsh direct afternoon sun
- A consistent light schedule
Too little light may prevent flowering, while too much direct sun can damage leaves.
Water Properly
Overwatering is one of the most common orchid care mistakes.
Orchids generally prefer:
- Thorough watering followed by drainage
- A growing medium that allows airflow
- Slight drying between waterings
Avoid letting the roots sit in standing water.
Maintain Good Humidity
Many orchids naturally grow in humid environments.
Indoor humidity can be improved by:
- Using a humidifier
- Grouping plants together
- Placing a humidity tray nearby
Avoid keeping orchids in areas with constant cold drafts or dry air from heating systems.
Choose the Right Potting Medium
Unlike many houseplants, orchids usually do not grow well in regular potting soil.
Common orchid mediums include:
- Bark chips
- Sphagnum moss
- Perlite mixtures
- Specialized orchid blends
These materials allow air to reach the roots.
Repot When Needed
Orchids usually need repotting every few years or when the growing medium breaks down.
Signs it may be time include:
- Decomposing bark
- Poor drainage
- Crowded roots
- Unhealthy-looking roots
Repotting with fresh medium can improve airflow and root health.
Frequently Asked Questions
Can regular houseplant fertilizer be used on orchids?
Some general fertilizers may work, but orchid-specific formulas are often designed with orchid needs in mind. If using a general fertilizer, it should be applied carefully and at an appropriate dilution.
How often should I fertilize my orchid?
Many growers use diluted fertilizer regularly during active growth. The ideal schedule depends on the orchid type, environment, and fertilizer used.
Can fertilizer make an orchid bloom?
Fertilizer provides nutrients that support plant health, but flowering also depends on light, temperature, maturity, and proper care.
Should I fertilize a newly purchased orchid?
New orchids may already have fertilizer in their growing medium. It is often best to allow the plant time to adjust to its new environment before beginning a feeding routine.
Why are my orchid leaves turning yellow?
Yellow leaves can result from several causes, including natural aging, overwatering, too much sunlight, or nutrient issues. Looking at the plant’s overall condition can help identify the cause.
Final Thoughts
Helping an orchid thrive does not require complicated techniques. A simple fertilizer strategy—providing small amounts of nutrients regularly instead of large doses occasionally—can support steady growth and healthier roots.
However, fertilizer is only one piece of orchid care. Proper lighting, careful watering, good airflow, suitable humidity, and the right growing medium all work together to create the conditions orchids need.
With patience and consistent care, your orchid can reward you with strong growth and beautiful blooms season after season.
